Search...
Design Maestro
This project is no longer under development. It has been replaced by the Alice app.
This is a package of Keyboard Maestro macro, created for designers who wants to optimise their workflow in macOS / Figma or Webflow.

Podium on Product Hunt! 🎉
In June 2022 Design Maestro took a 3rd place on Product Hunt

Design Maestro FREE
The project was published at the end of March 2022 as a free version of 10 macros: https://designmaestro.io
In May 2022, I discovered an action in Keyboard Maestro called Custom HTML Prompt, which is intended to allow you to display a dialog box based on your own HTML code. I decided to take advantage of this to create a fully customized interface for Design Maestro, which looks as follows:
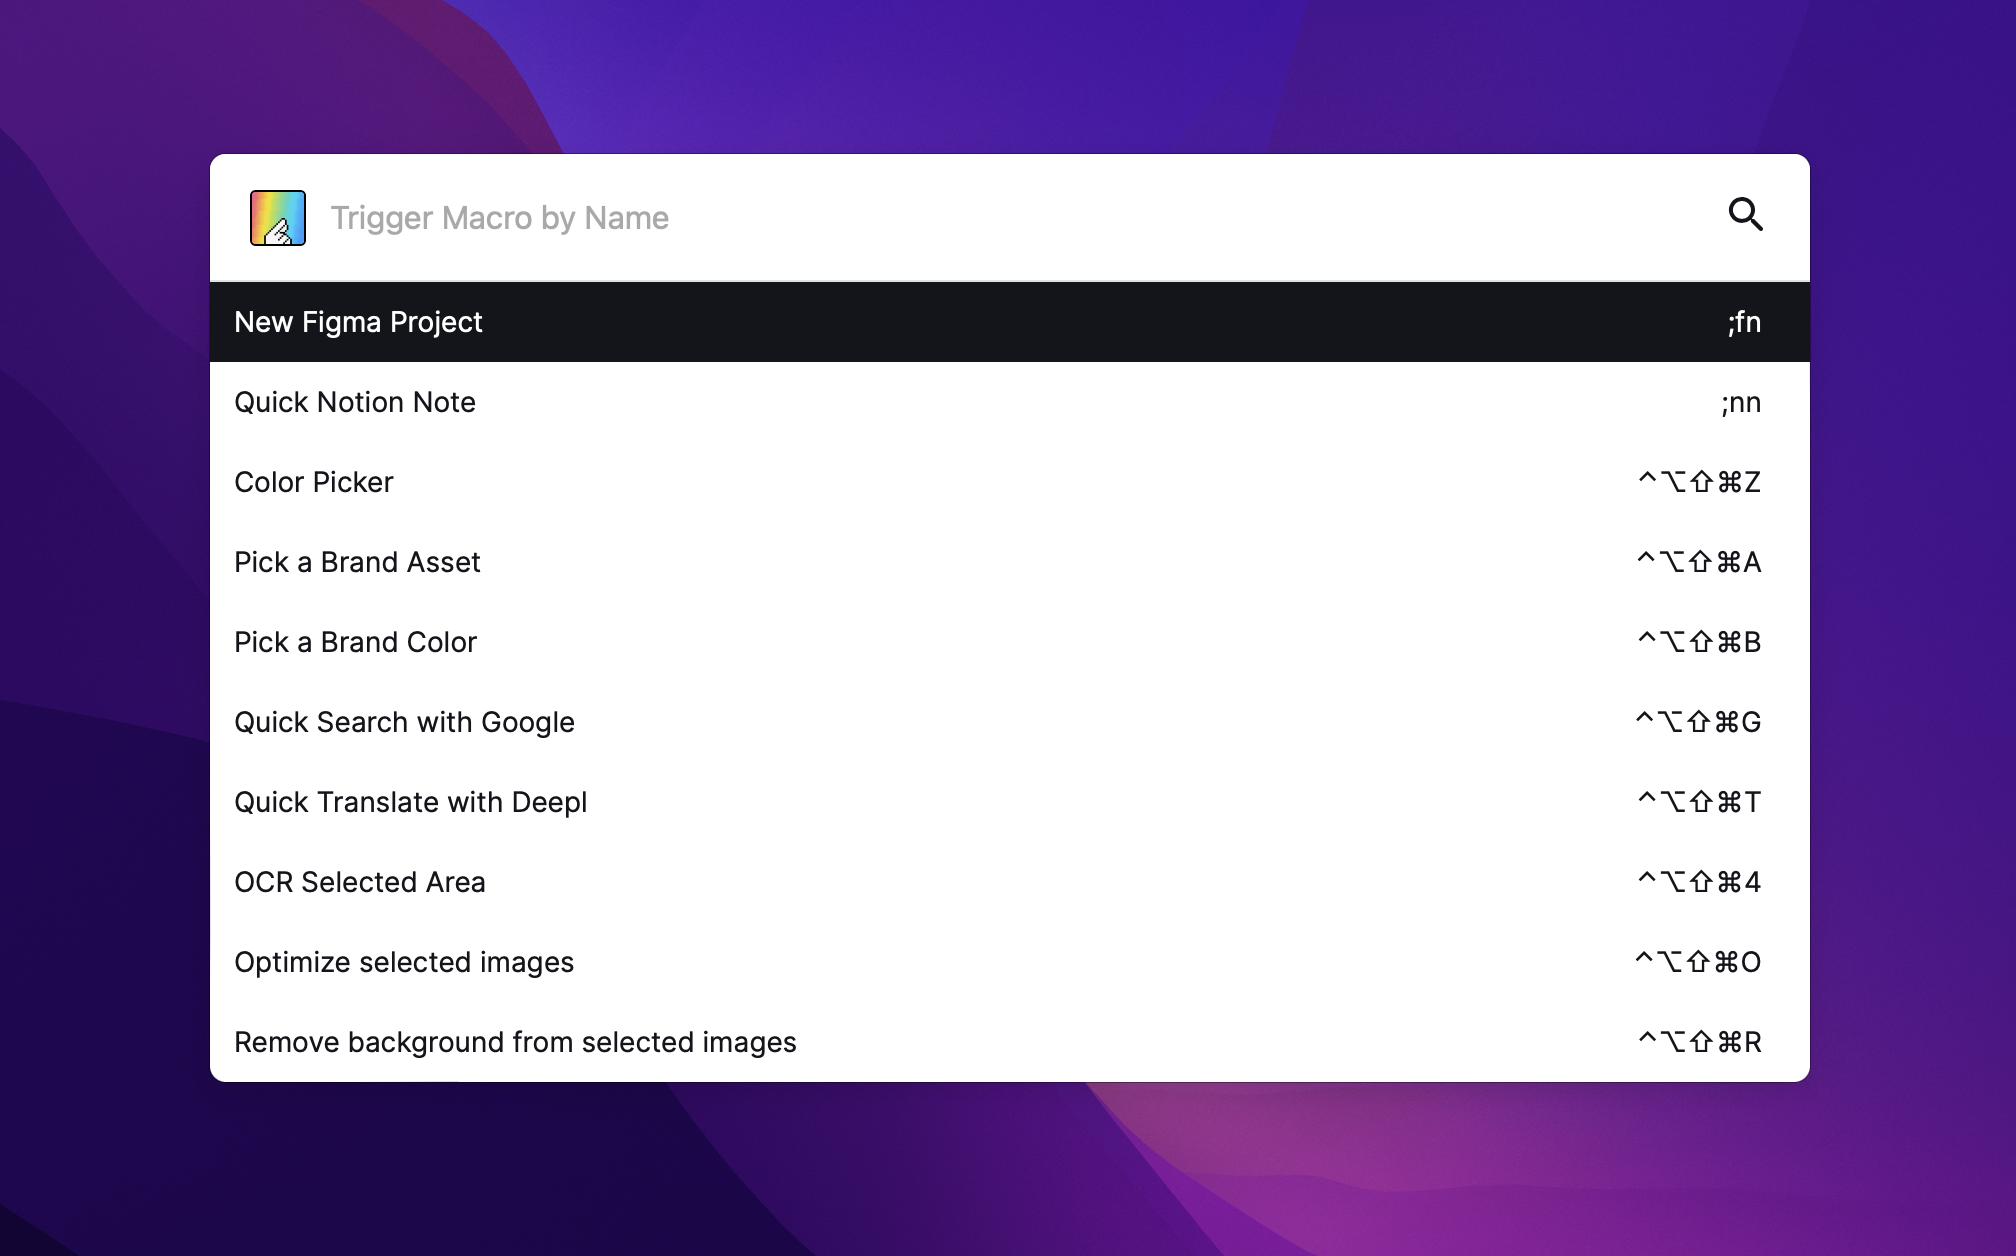
The entire interface was created with HTML/CSS and JavaScript with Svelte framework bundled with Vitejs.dev. What's more the whole interface is based on JSON objects which means that you can create your own list, prompts and forms.

Predefined Macros
We have created a set of predefined, plug&play macros you can use right away. DesignMaestro macros were created with designers in mind to improving their work by saving time on repeatitive tasks.
This includes:
- optimizing image file sizes (with tinyPNG API)
- removing backround from selected images (with remove.bg API)
- assets picker
- color picker (from library)
- global system picker (copying hex color from pixel which is pointed with a mouse)
- screen OCR
- quick translation & searching
- quick creating a figma, notion and webflow projects
- pasting
Lorem ipsum dolor sit amet, consectetur adipiscing elit interdum hendrerit ex vitae sodales.
Those macros are available here for free: https://designmaestro.io.
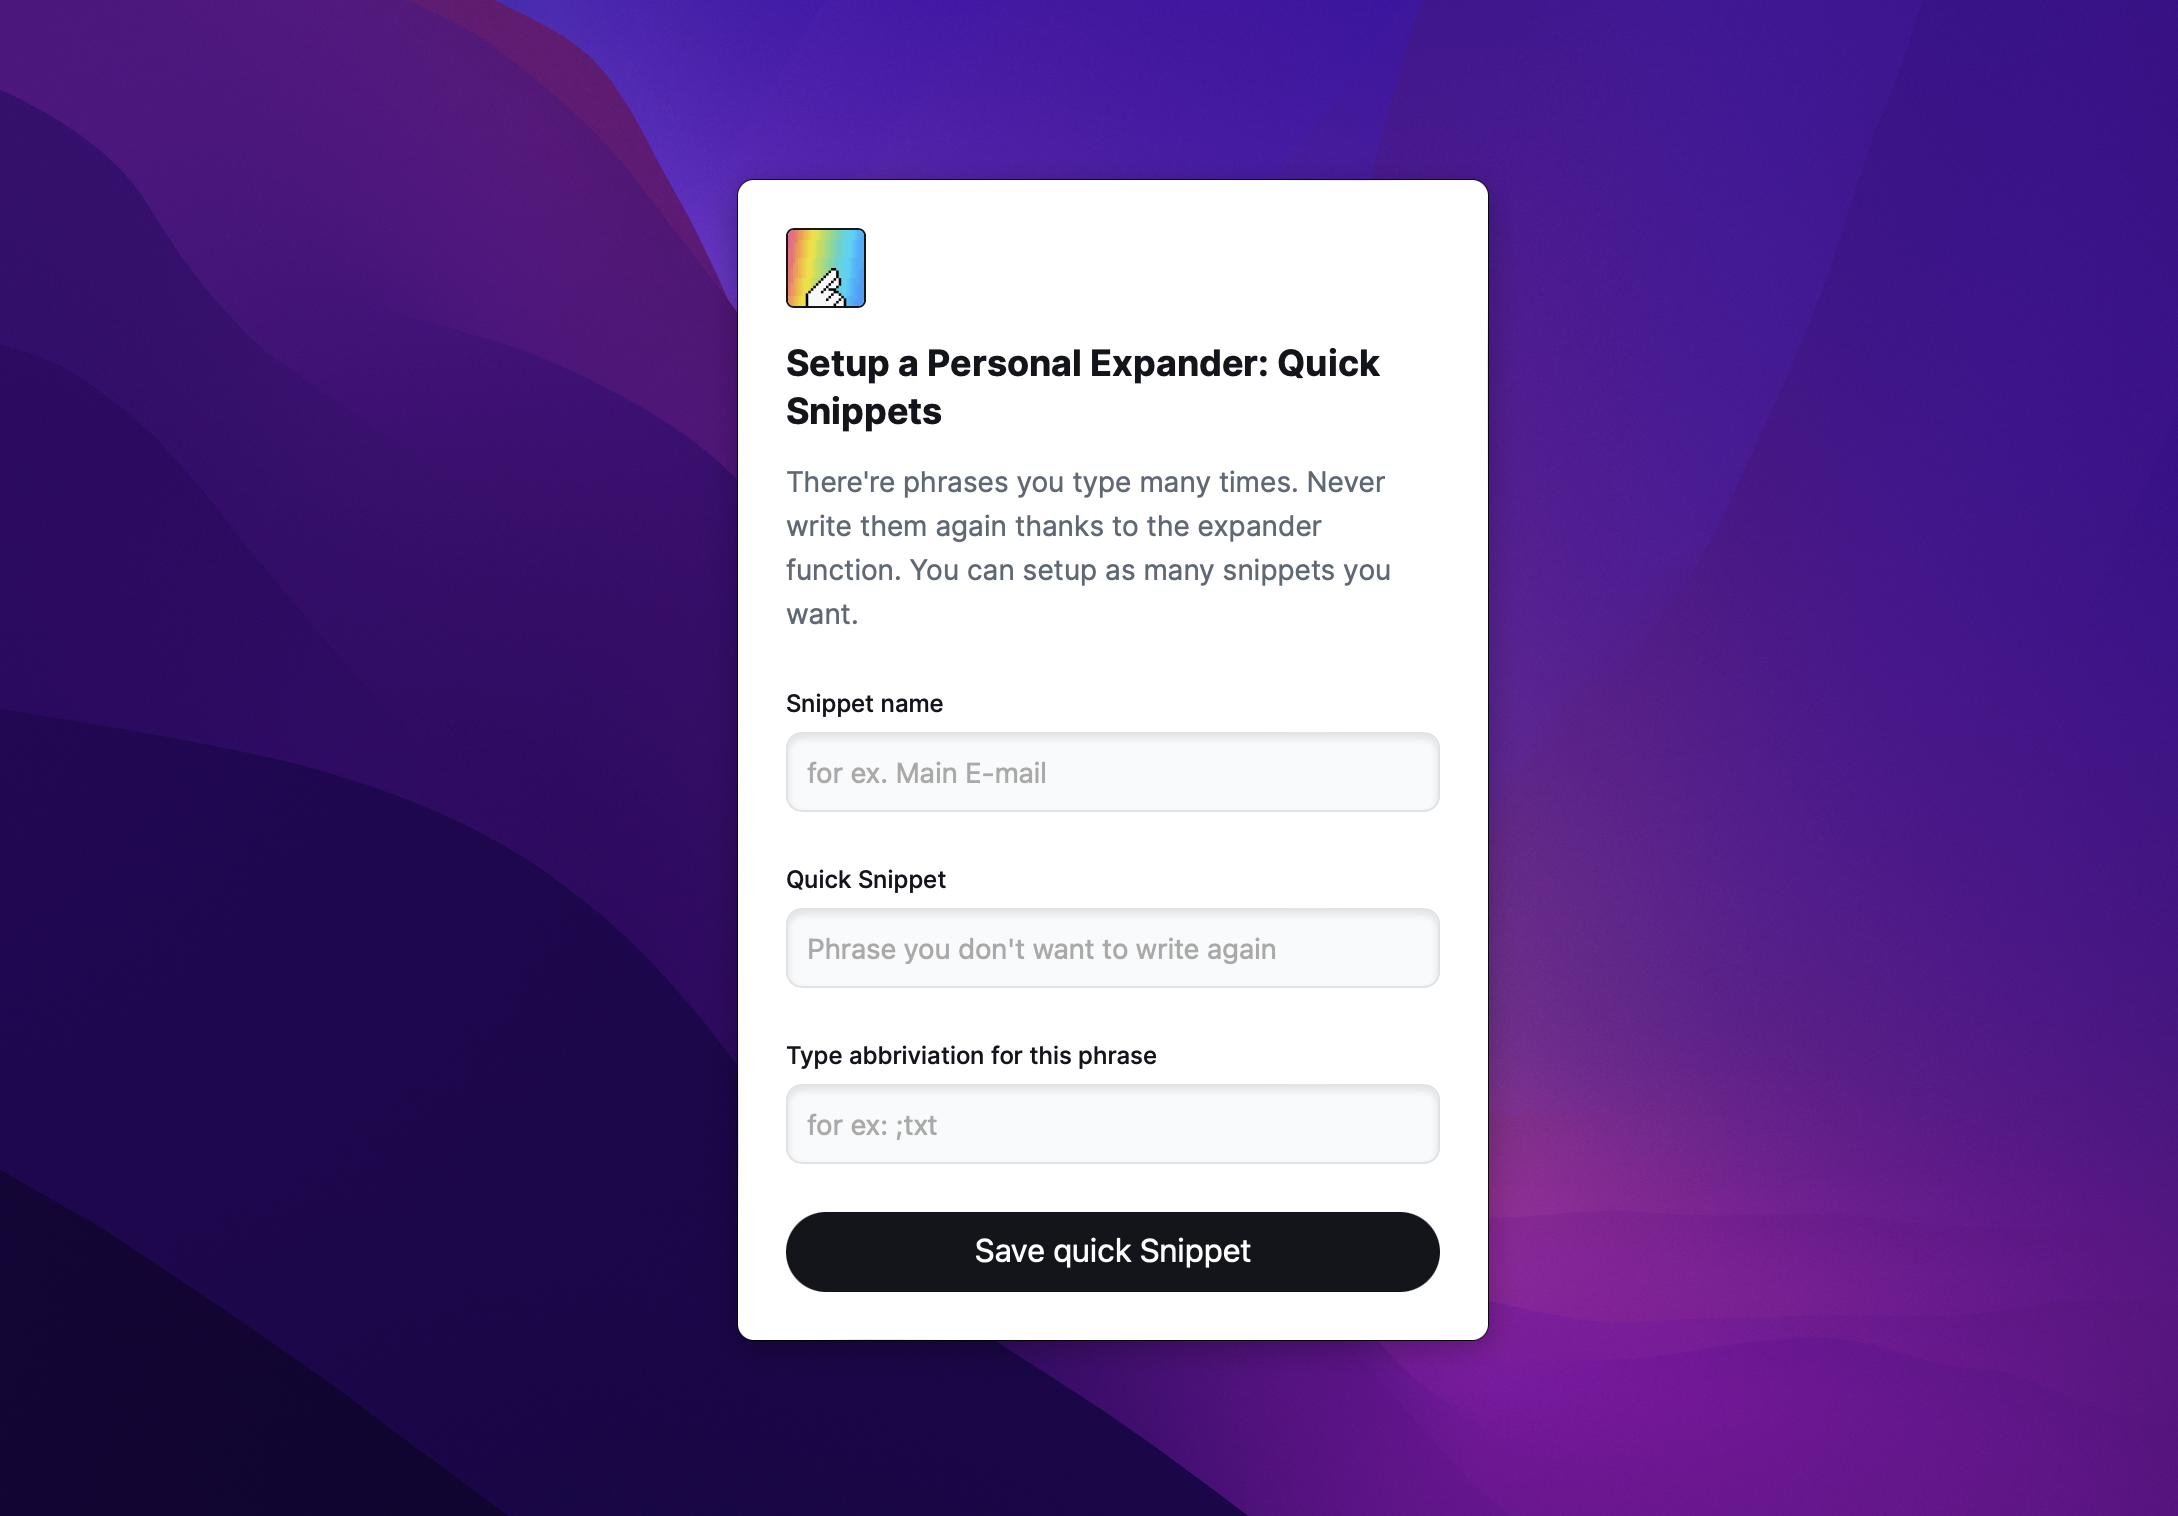
Create a custom Prompt
DesignMaestro allows you to create a simple form which contains:
- a title & description
- form inputs (text, textarea, select, color, radio, datetime-local)
- actions buttons (confirm and cancel)
An example looks like this:
In order to generate this prompt like this, basically you have to:
- Create a JSON object and save it's stringify version in a
DMLaunchervariable of Keyboard Maestro. - Use
Execute a Macroaction and trigger(util) Rendermacro.
All input values will be saved in Keyboard Maestro variables and names of those variables will match inputs name field. For example: <input name="example" /> value will be saved in a variable with a name example.
| Please note that those variables will be saved only if Prompt will be ended with a confirmation (pressing Enter or Primary button)
JSON reference both for prompt and lists configuration looks like this:
{

  "type": "prompt", // prompt or list

  "actionType": "default", // required only for type: "list". default - trigger macro by name | download - downloads a image file and set its content to clipboard | copy - copy a value of list item to a clipboard

  "header": {

    "active": true,

    "title": "", // prompt header

    "description": ""  // prompt description

  },

  "actions": { // custom prompt actions

    "mode": "decision", // decision | confirm. Decision displays boths confirmation & cancel buttons and confirm displays just a confirm button

    "visible": true, // true | false - with type of list, actions should be set to false
bra
    "confirmLabel": "Translate", // confirm button label

    "cancelLabel": "Nevermind" // cancel button label

  },

  "inputs": [] // see a reference below. This is required for `type: prompt`

  "list": [] // see a reference below. This is required for `type: list`

}
JSON reference for inputs looks like this:
As you can see it's an array of objects describing each input field.
json
[

	{ // TEXT / TEXTAREA / DATE INPUT FIELD

      "type": "text", // text | textarea | datetime-local

      "name": "textVar", // value of this input is connected with KM variable with this name

      "label": "This is a text field", // input label

      "value": "default value", // it can be set right here or by setting a KM Variable with a name coresponding to this input name.

      "placeholder": "Type something", // input placeholder

      "focused": true, // autofocus. Make sure to have a single one for each prompt

	  "rows": 8 // for textarea only! Default: 8

    },

    { // COLOR picker input

      "type": "color",

      "name": "colorVar", // value of this input is connected with KM variable with this name.

      "value": "#ffffff", // it can be set right here or by setting a KM Variable with a name coresponding to this input name.

      "label": "Quick Snippet", // input label

    },

    { // SELECT input

      "type": "select",

      "name": "selectVar", // value of this input is connected with KM variable with this name.

      "label": "Select something",  // input label

      "placeholder": "Choose", // input placeholder

      "value": "en/pl", // default value

      "focused": true, // autofocus. Make sure to have a single one for each prompt

      "options": [ // An array of options
        {
          "label":"Label", // Option label
          "value": "option1",  // Option value
          "selected": true // true / false is selected
        }
	  ]
	}
]
JSON reference for list items looks like this:
As you can see it's an array of objects describing each list item.
[
  {
	  "label": "", // list item main label
	  "value": "", // value of an item. May be: a macro name to trigger, value to be copied to clipboard or an image file needed to be downloaded and copied to clipboard
	  "description":"" // description of an item, is showing on a right side
	  "thumbnail": "" // (optional) url to a thumbnail (must be public and point to the image file)
  }
]
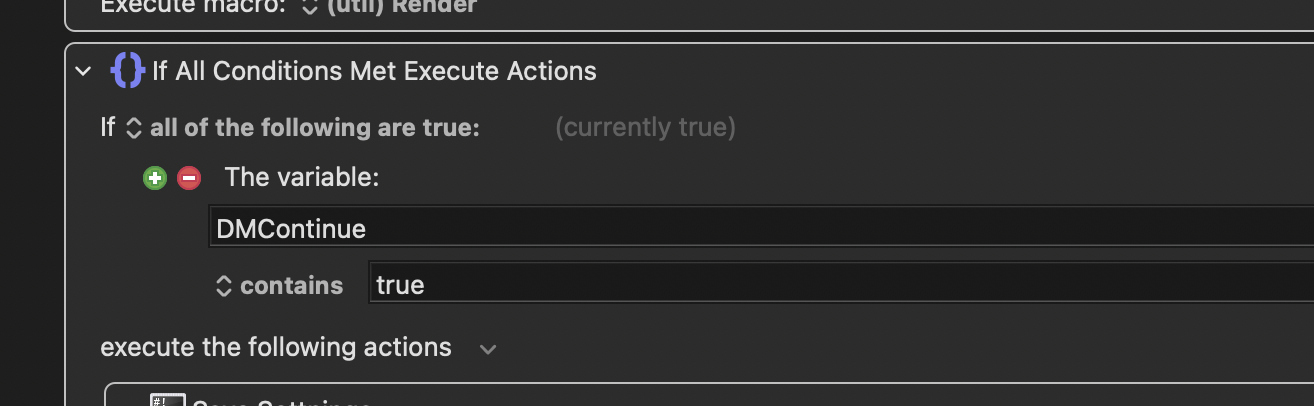
Confirm & Cancel actions
While prompt is displayed there're two ways to close it: by confirming, which means saving a variables to Keyboard Maestro or by cancelling and just closing a window.
In order to make sure that following actions won't be activated, just use if statement and check if a variable called DMContinue is set to true, like so:
Summary
In order to generate a new prompt you need to:
- create a configuration JSON
- add
inputs(for type: prompt) andlist(for type: list) - trigger a macro called
(util) RenderwithExecute a Macroaction.